Solutions to Wsappx Takes High Disk and CPU Usage on Windows 10
Brithny updated on Aug 11, 2019 to Partition Master | How-to Articles
- Check Your Disk and Clean Up Junk Files
- Scan Your Computer to Check Virus
- Disable Windows Store via Local Group Policy
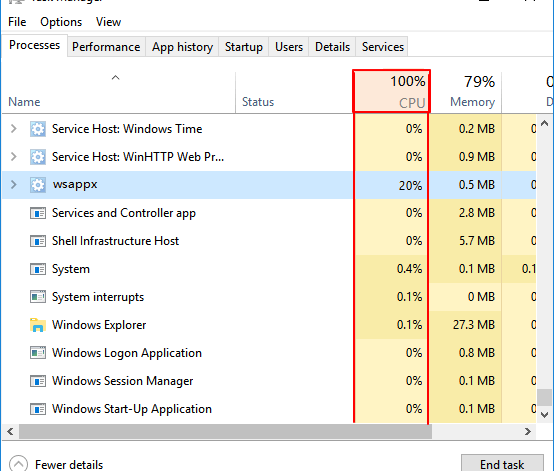
Wsappx Takes High Disk and CPU Usage
Wsappx is a process that runs in the background on your Windows 10/8 computer as a part of the Windows Store and the Universal app platform of Microsoft. It is used for installations, updates, and uninstallation of Store apps, so once you are done installing all updates, you don’t need it. But at times you may face situations where you find that this process is using high disk, CPU or memory.
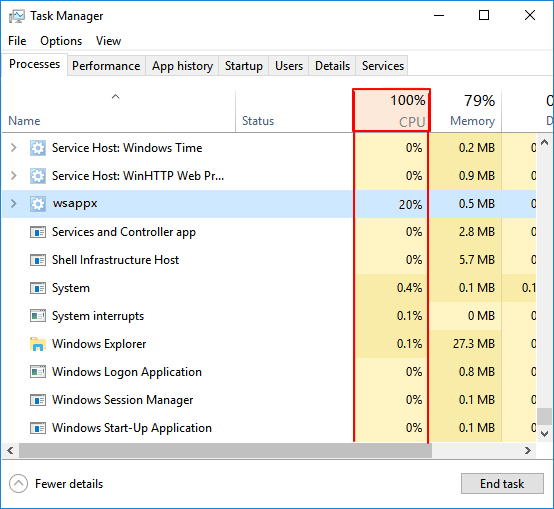
When you see wsappx hogging much of your CPU or Disk usage, in some cases, you will see wsappx (2) or wsappx (3) takes high disk usage, what would you do to fix wsappx taking the high disk and CPU usage on Windows 10 and speed up your PC?
From what we know, this is a common problem in Windows. We have some effective solutions to help you get out of this situation.
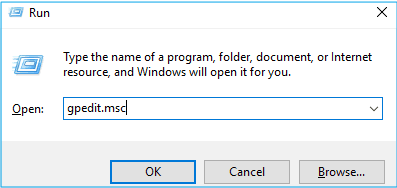
Solution 1. Disable Windows Store via Local Group Policy
Press the Windows logo key + R then type gpedit.msc and click OK.
- Follow the path: Local Computer Policy >> Computer Configuration >> Administrative Templates >> Windows Components >> Store.
- Right-click Turn off the Store application and click Edit.
- Change the status to Enabled. Click Apply and OK to save and exit.
- Restart your computer so the change can take effect.
After the above steps, you can start your PC to check whether this solution works or not. If this solution fails to fix the high disk usage problem, please move on solutions below.
Solution 2. Check Your Disk and Clean Up Junk Files
For those who got this problem very recently, performing a disk check should be taken into account.
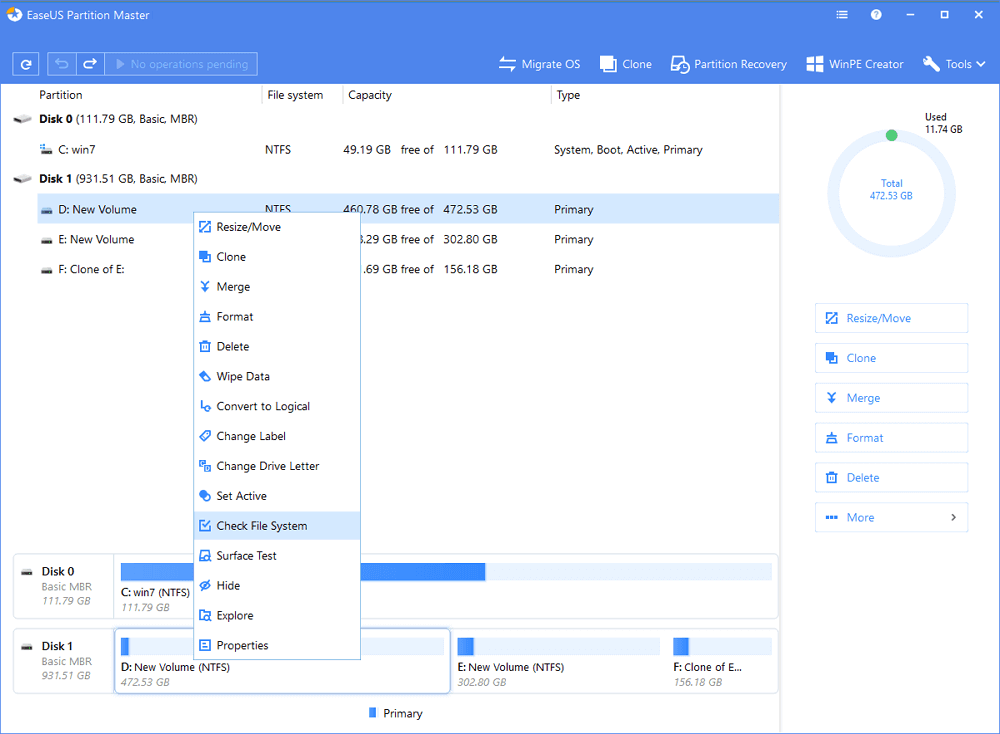
In order to perfectly solve this case, we need a free tool to help us – EaseUS free partition tool. This professional tool can help get this work done, and here is the detail:
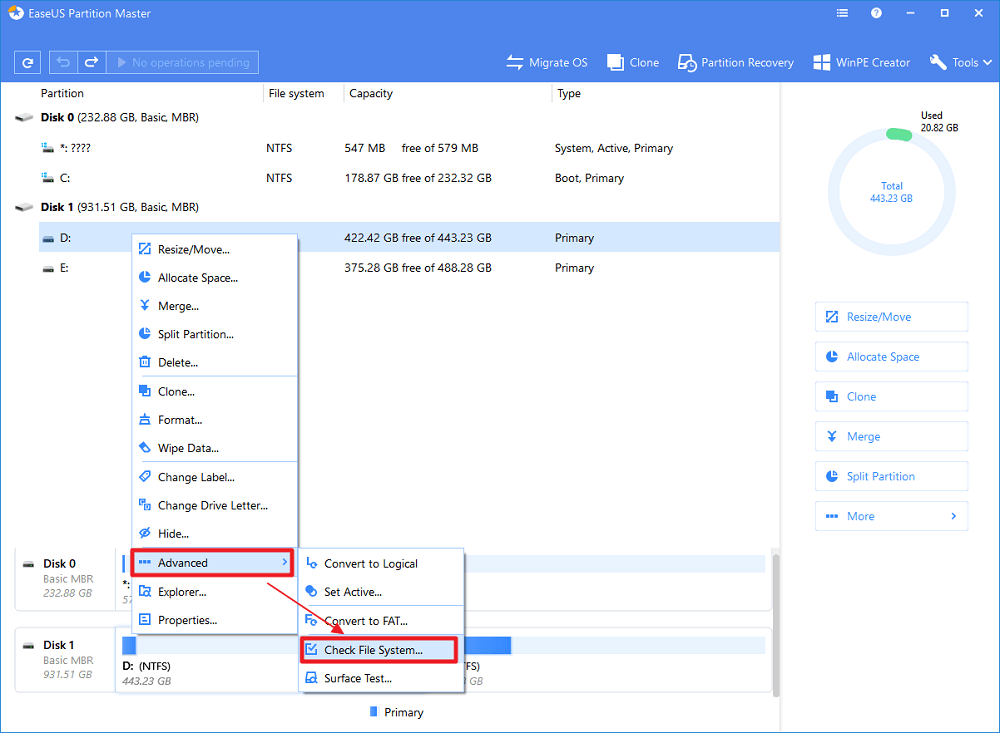
Step 1: Open EaseUS Partition Master on your computer. Then locate the disk, right-click the partition you want to check, and choose “Check File System”.
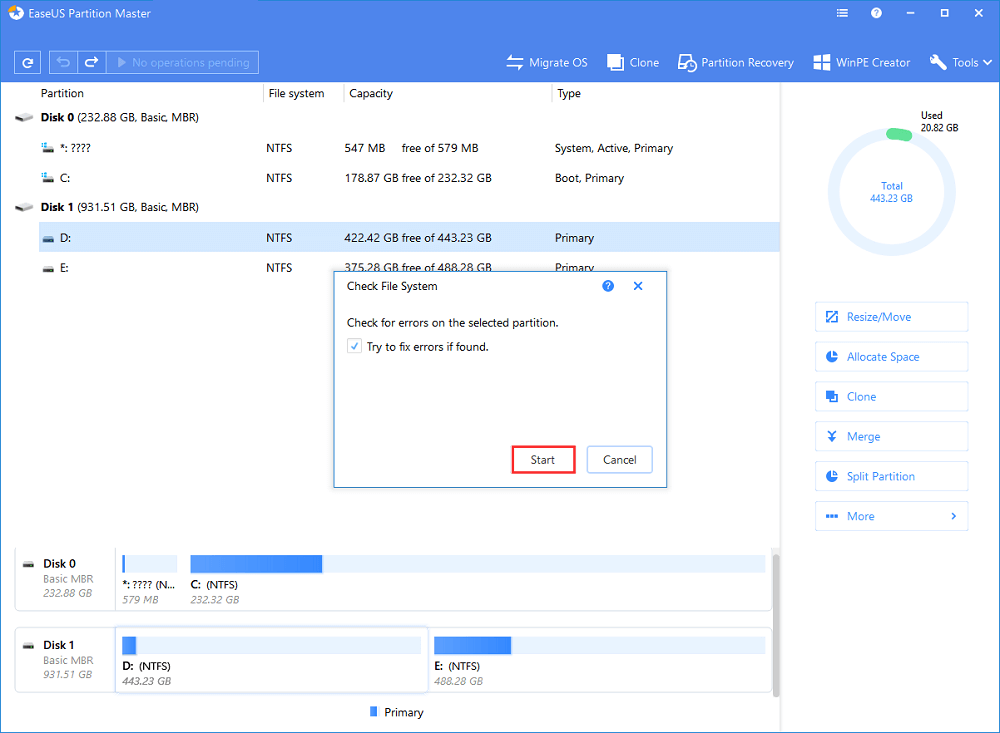
Step 2: In the Check File System window, keep the “Try to fix errors if found” option selected and click “Start”.
Step 3: The software will begin checking your partition file system on your disk. When it has completed, click “Finish”.
Then, you can clean up the junk files after checking the disk error. When you finish all the steps, reboot your Windows 10. Go to Task Manager to see if the disk usage of wsappx is normal.
Solution 3. Scan Your Computer to Check Virus
Most people often ignore that in certain cases, this problem is caused by viruses or malware infection. If you haven’t fully scanned your system with an antivirus program, do it now.
When the full scan finishes, remove any superstitious programs from your PC. Then restart your computer to see if there is any change.
A lot of situation may cause wsappx taking high disk and CPU usage problem. If you still haven’t found effective solutions, you can contact us. Never hesitate to let us help you.
